Setting up your class on Sympos.
This guide takes you from nothing to a live class with students enrolled. Budget 10 to 20 minutes, plus however long you spend polishing your first assignment. Sympos does three things for your course: assignments, insights, and contextual AI for you and your students. The setup steps below get you into all three.

The setup path
- 01Sign up
Create your account.
- 02Redeem
Activate instructor access with your pilot code.
- 03Create
Your class, built from your material.
- 04Upload
The rest of your course material.
- 05Assign
Your first assignment.
- 06Share
The join code. Students enroll themselves.
- 07Introduce
Sympos to your students.
Getting set up
Create your account
Create an account at sympos.org. Use your institutional email if you prefer; either works.
Activate instructor access
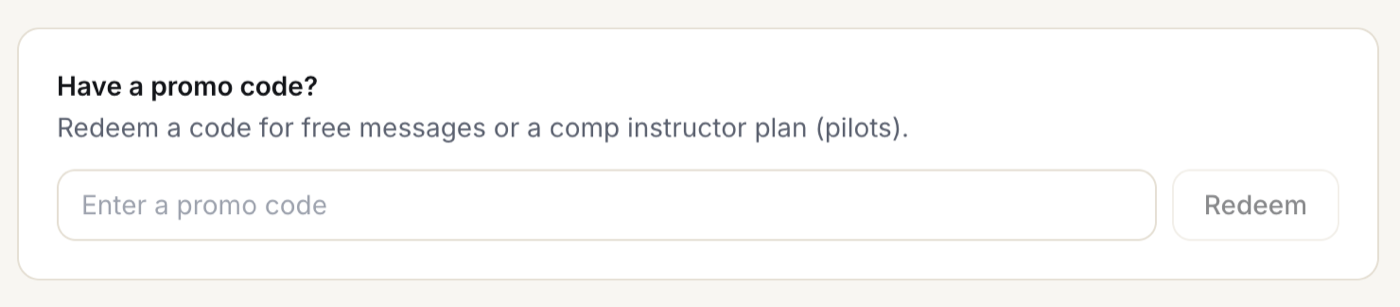
On sympos.org, go to Settings → Billing & plan and enter the pilot code from your welcome email in the “Have a promo code?” box, then click Redeem. You may need to refresh the page; you now have instructor access. The pilot code covers you and your students.
Create your class
Click Create your first class. Two short steps:
- Basics. Upload Syllabus (recommended): the AI extracts the class details from a PDF or TXT syllabus; review and correct what it pulled. Or Build from Scratch.
- Visibility. Choose private (students join only with your code, the usual choice for a course) or public. Then create the class.
Upload your course materials
Open your new class from My Classes and use Upload to add lecture slides, readings, notes, and problem sets. Supports PDFs, slides, Word documents, spreadsheets, CSVs, notebooks, code files, plain text, LaTeX, and images.
Assignments
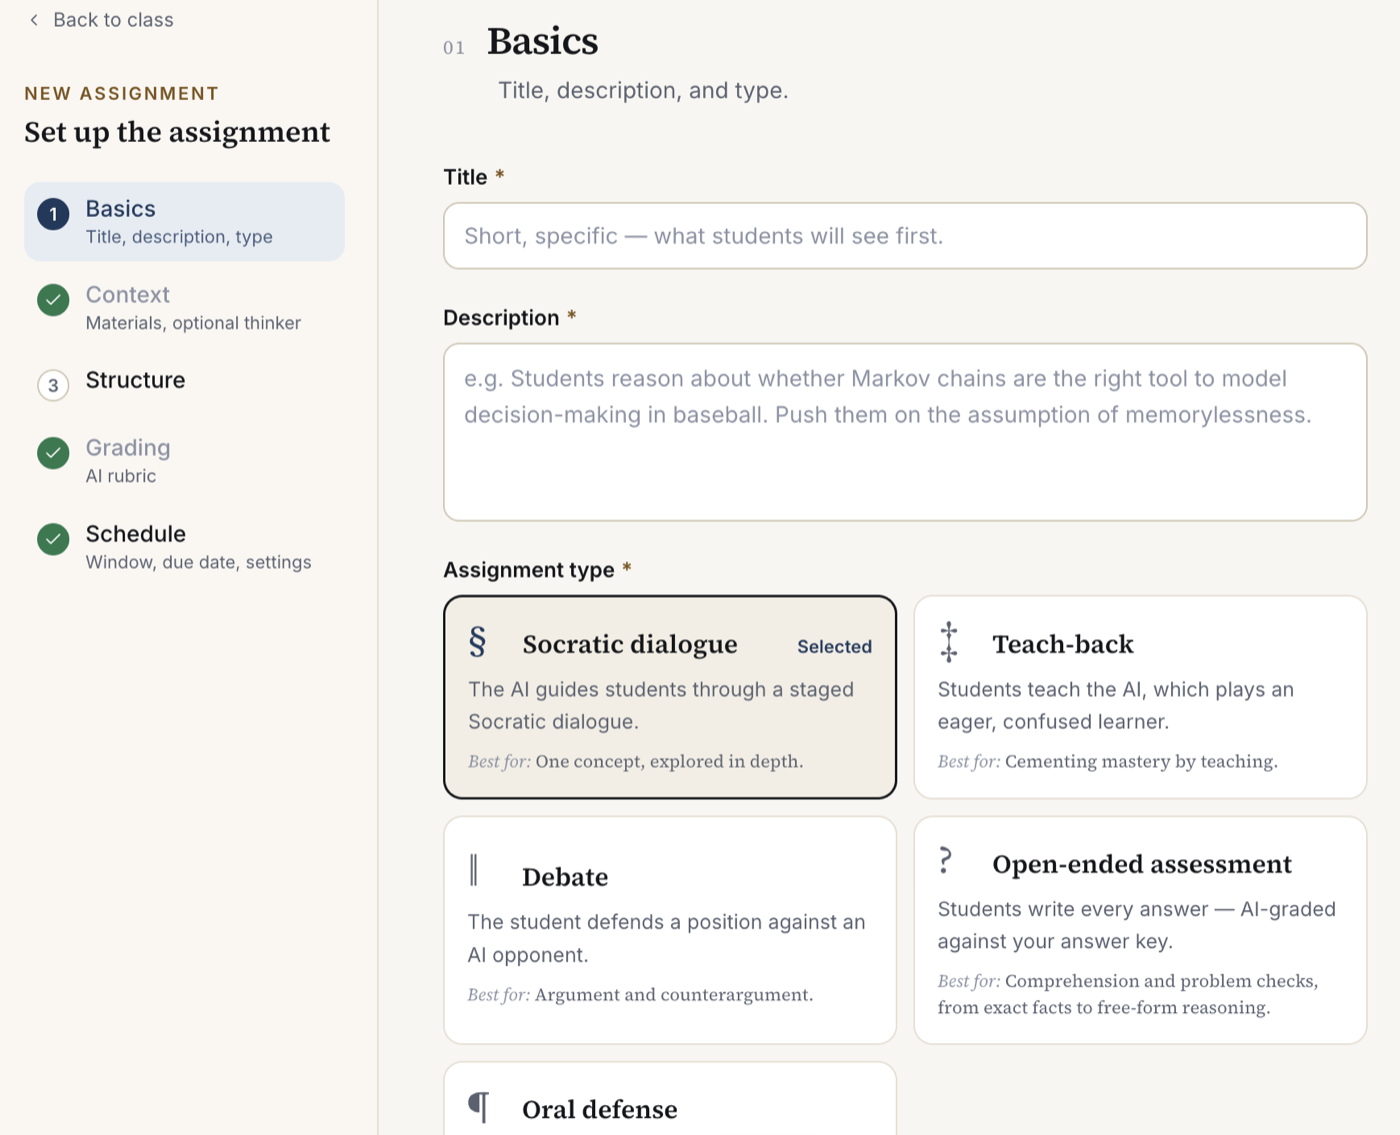
The AI conversation is the assignment: students reason out loud through a dialogue, so there is nothing to copy and paste. From your class page, open Assignments and create a new one.
Pick a type
- Socratic dialogue
A staged discussion; the student must reason through checkpoints you define.
- Teach-back
The student teaches the concept to the AI.
- Debate
The student argues a position against the AI in structured rounds.
- Open-ended assessments
Free-response work in the student's own words, including essays.
- Oral defense
The student submits their own completed work and defends it in an examination with the AI.
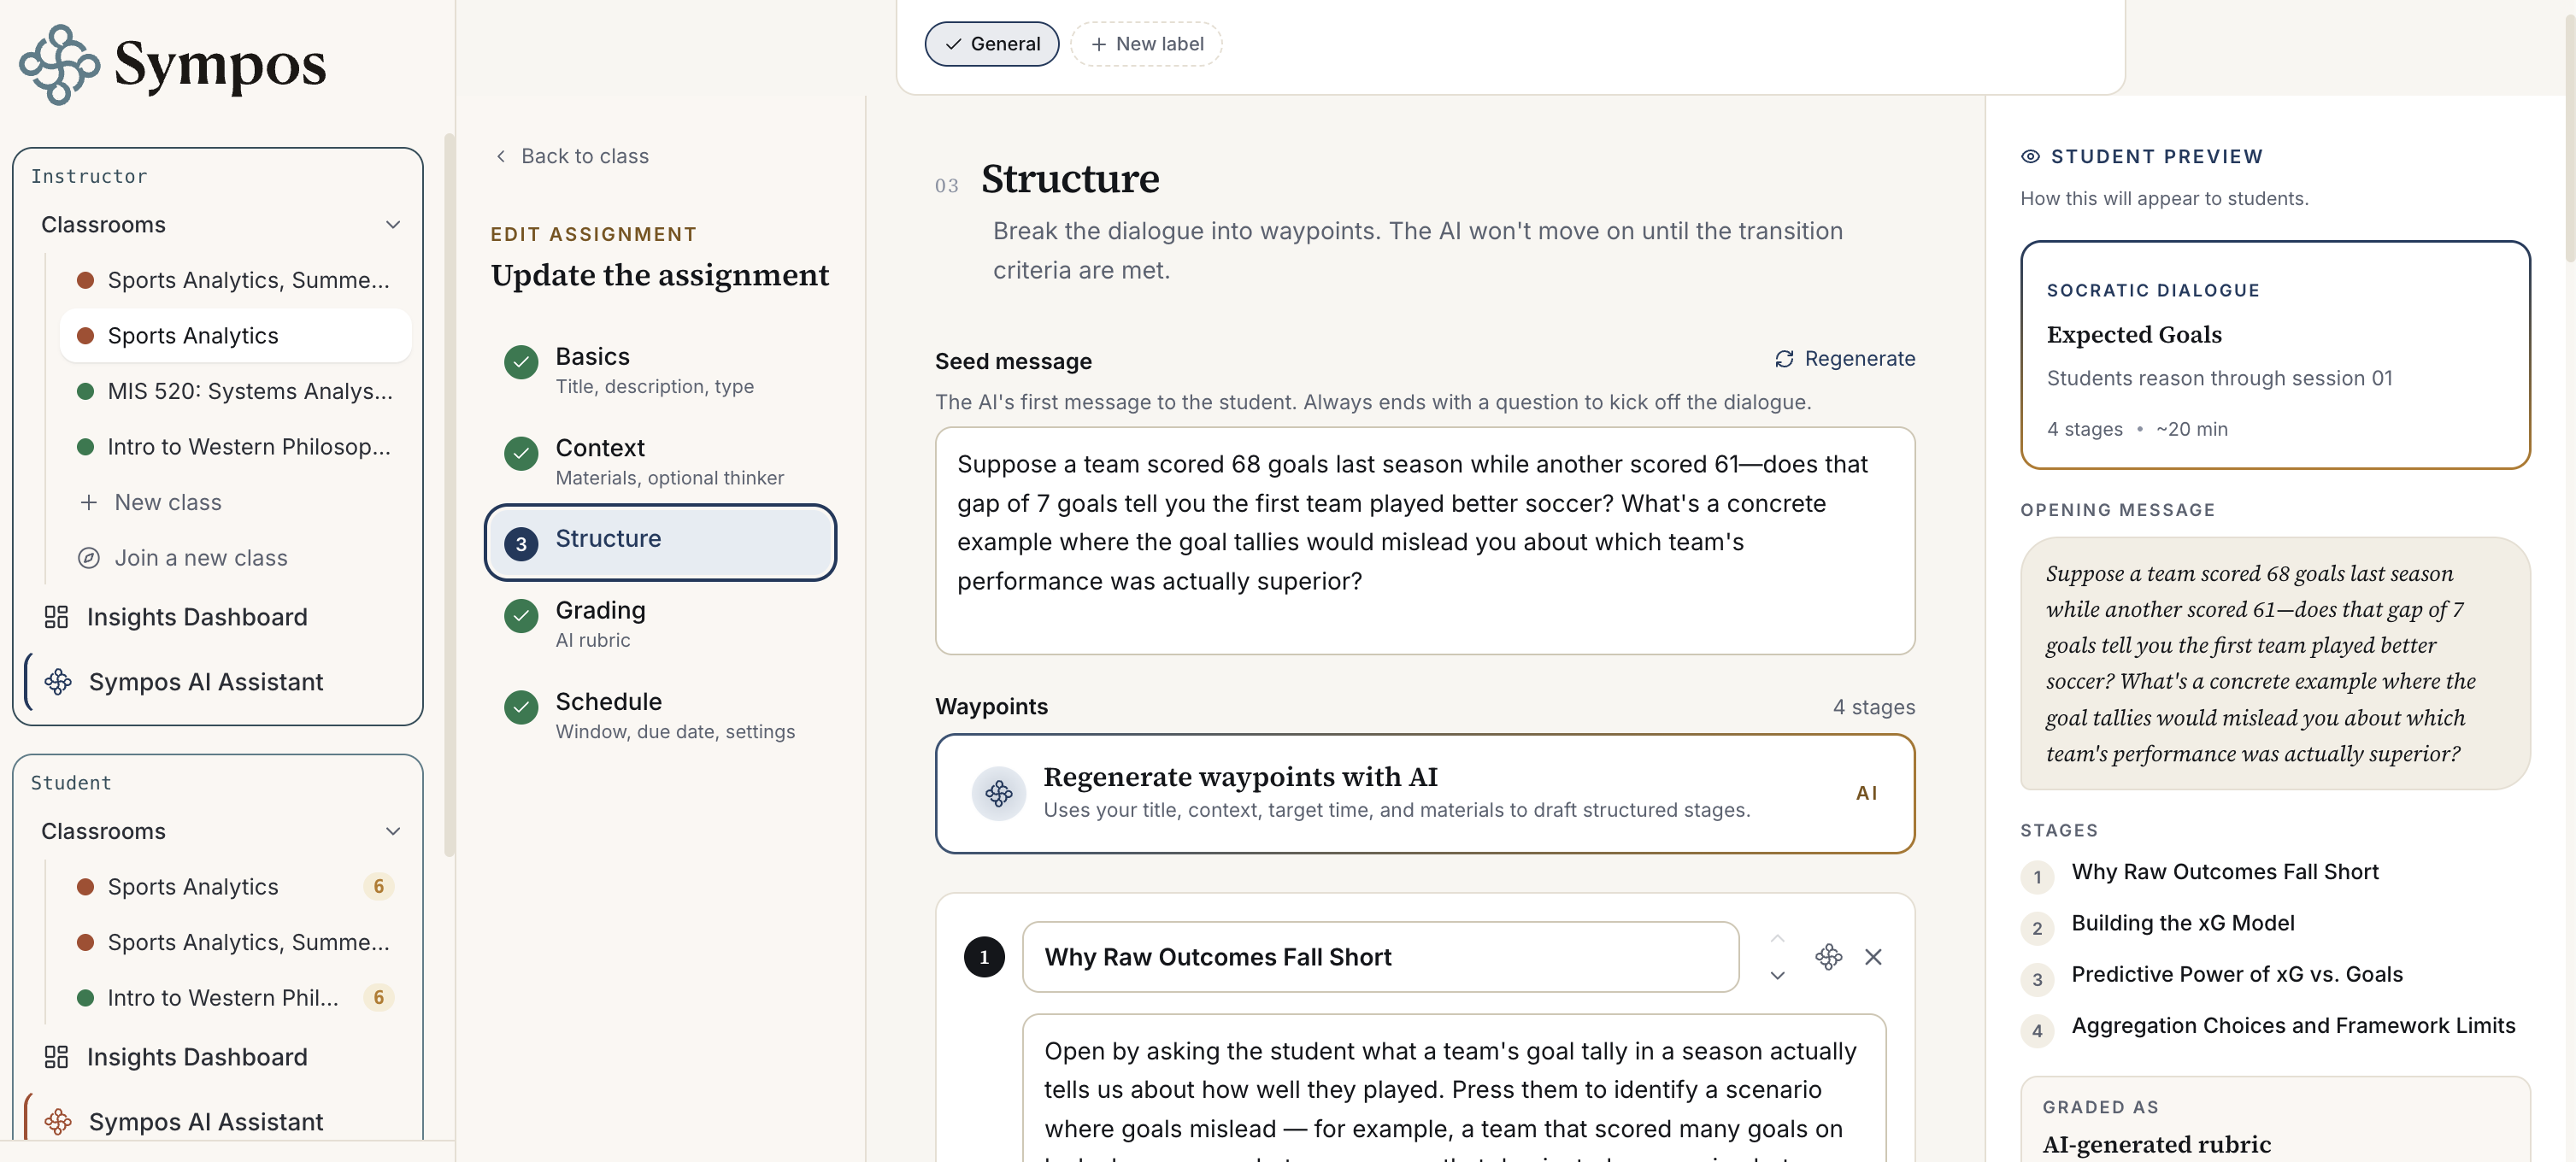
You design the conversation
- Socratic dialogue: Set the waypoints and checkpoints the student must reason through.
- Teach-back: Set the key topics the student must cover.
- Debate: Set the key topics the rounds must argue.
- Oral defense: Set how the student's submitted work is questioned and probed.
Insights
As students work, Insights read the conversations so you do not have to. Three levels, from one student to the whole course. Worth a look before each lecture.
- Level 1
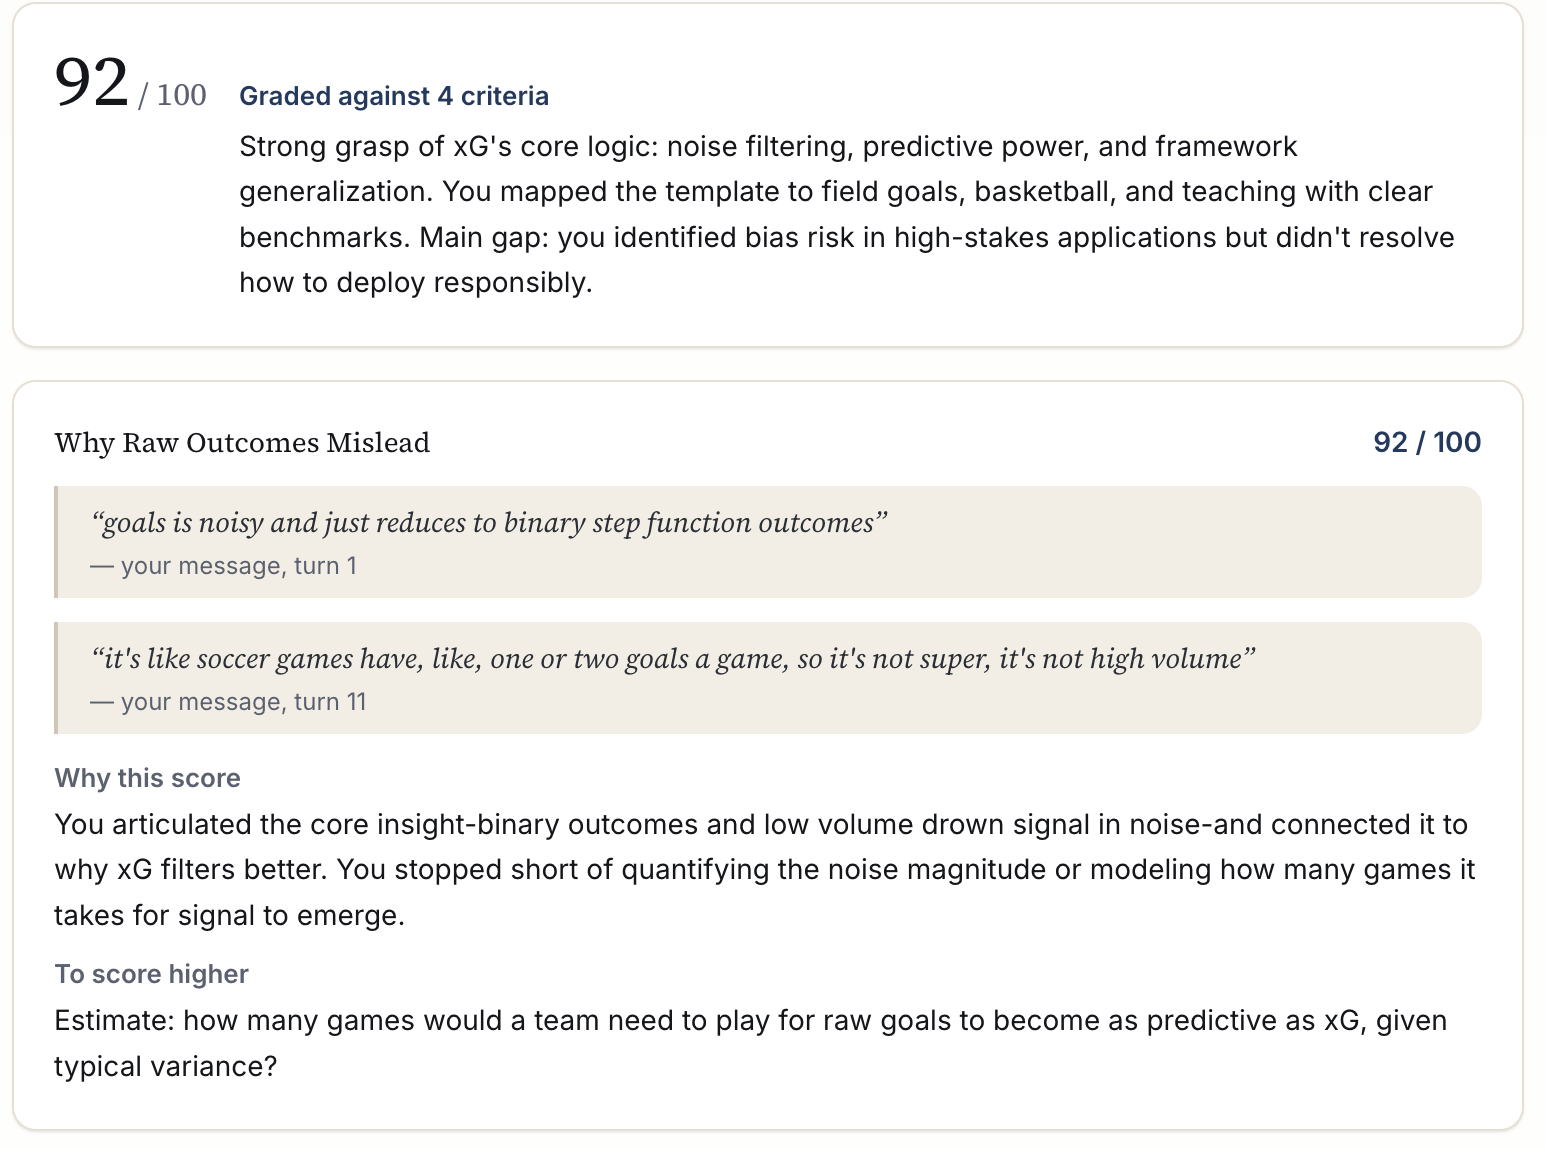
Student level
Each student's work is evaluated against the criteria you set, and every score quotes the exact transcript lines behind it, so you can see the reasoning behind each grade.
- Level 2
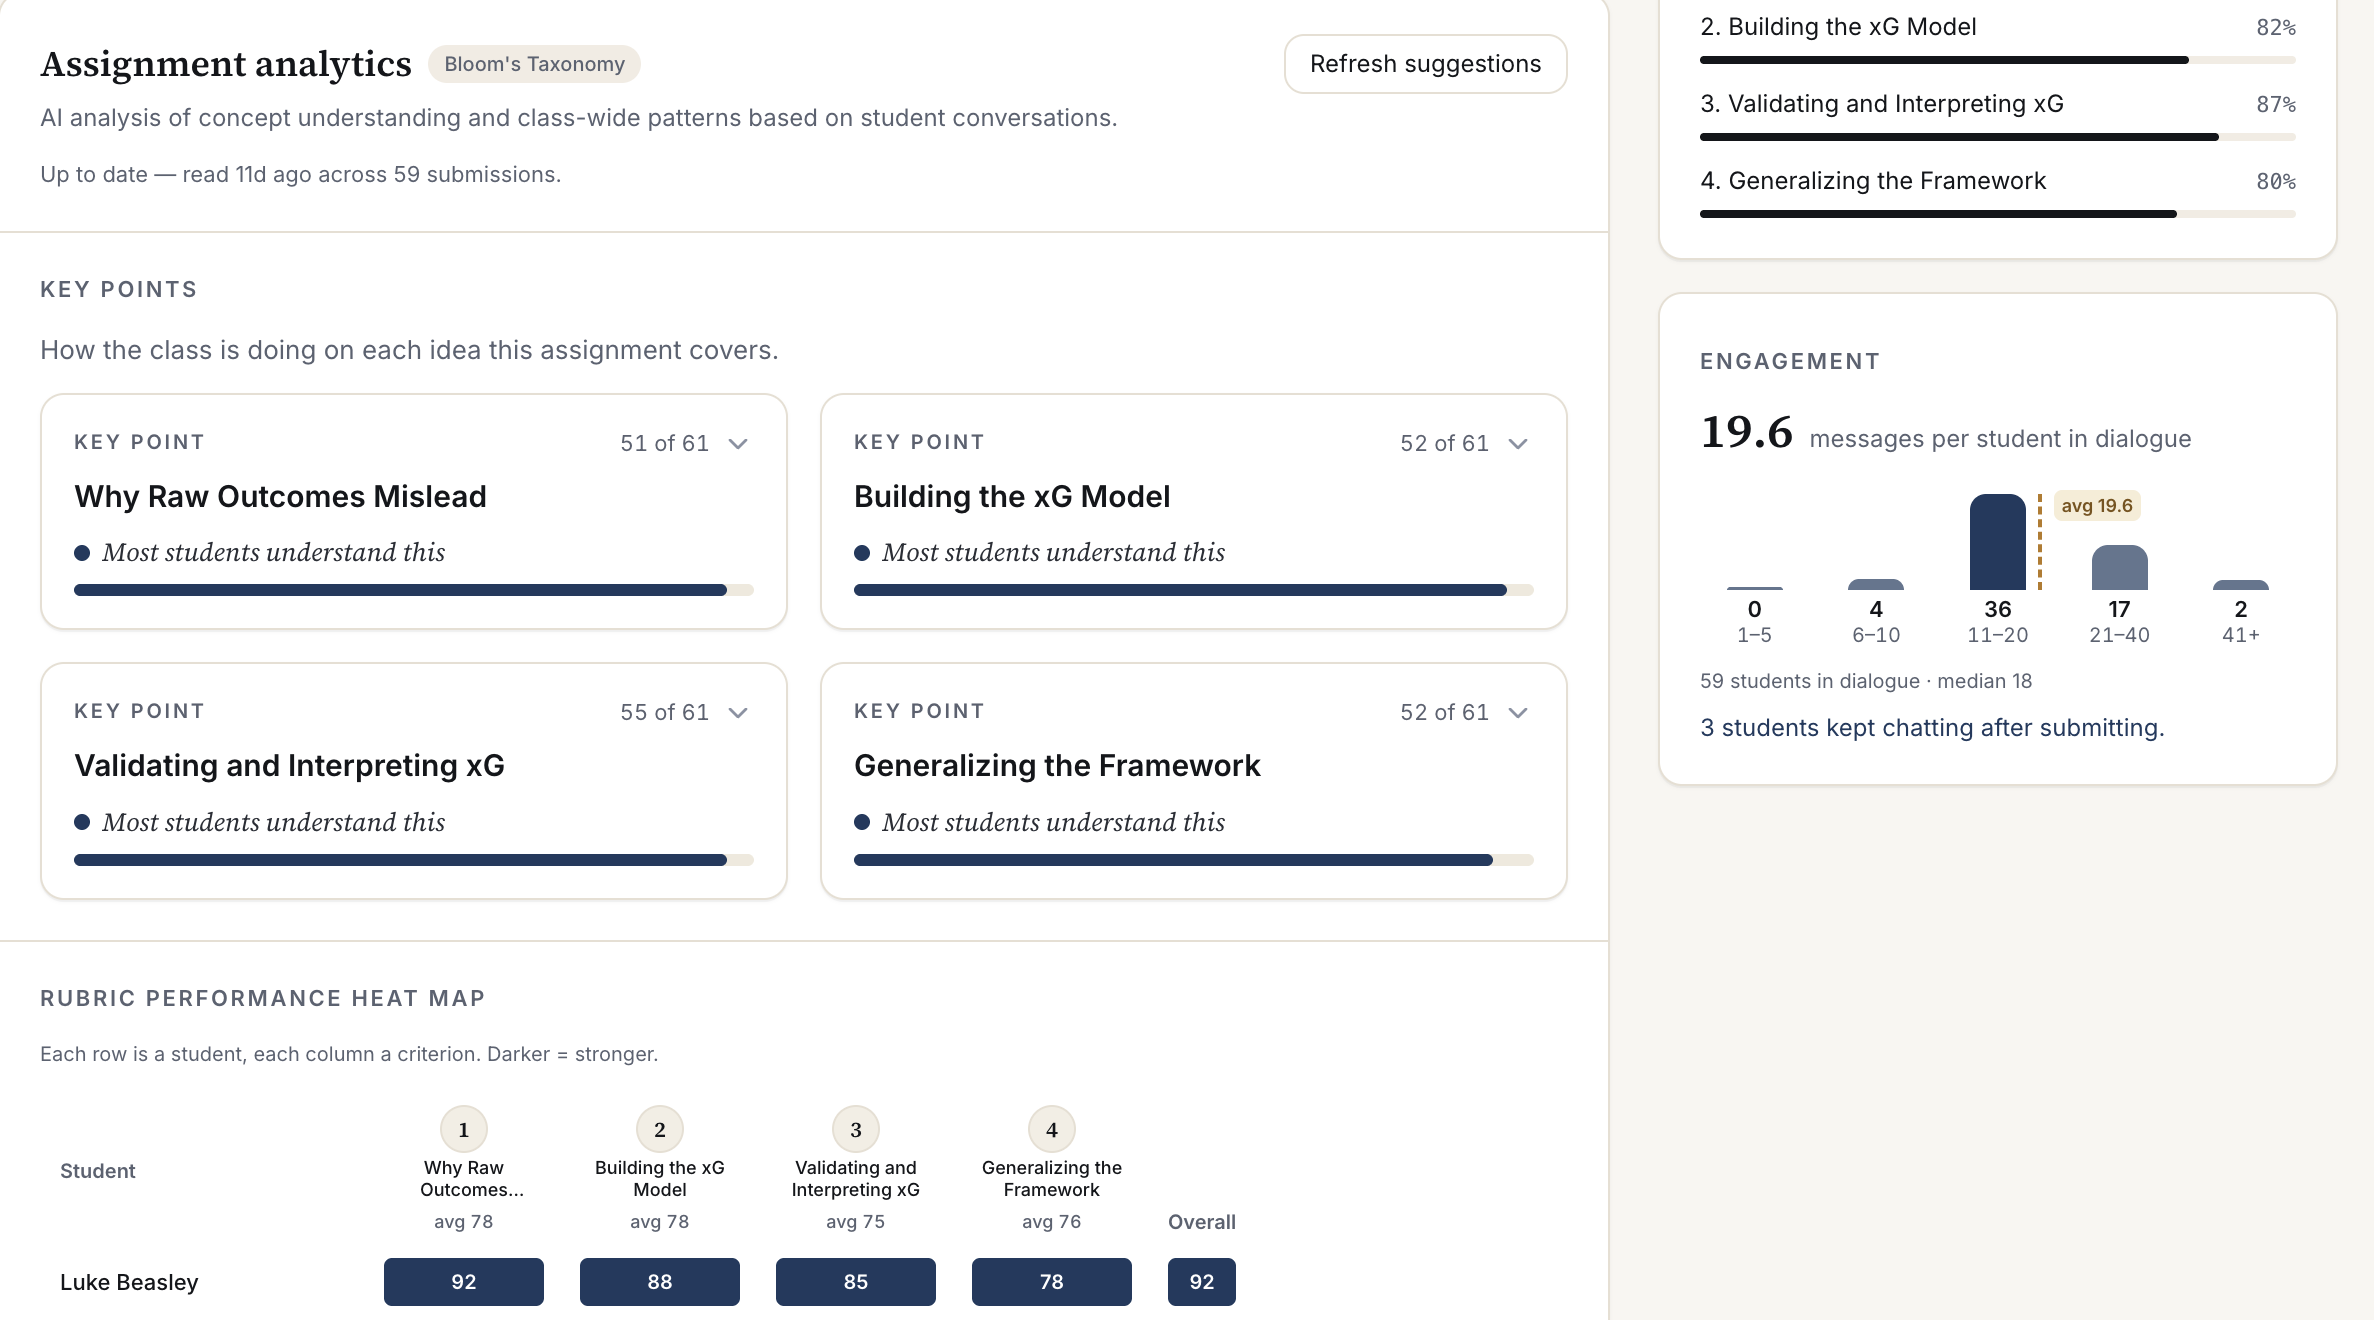
Assignment level
For each assignment: which concepts landed and which broke down, scored from real student conversations, plus how deeply students engaged in the dialogue.
- Level 3
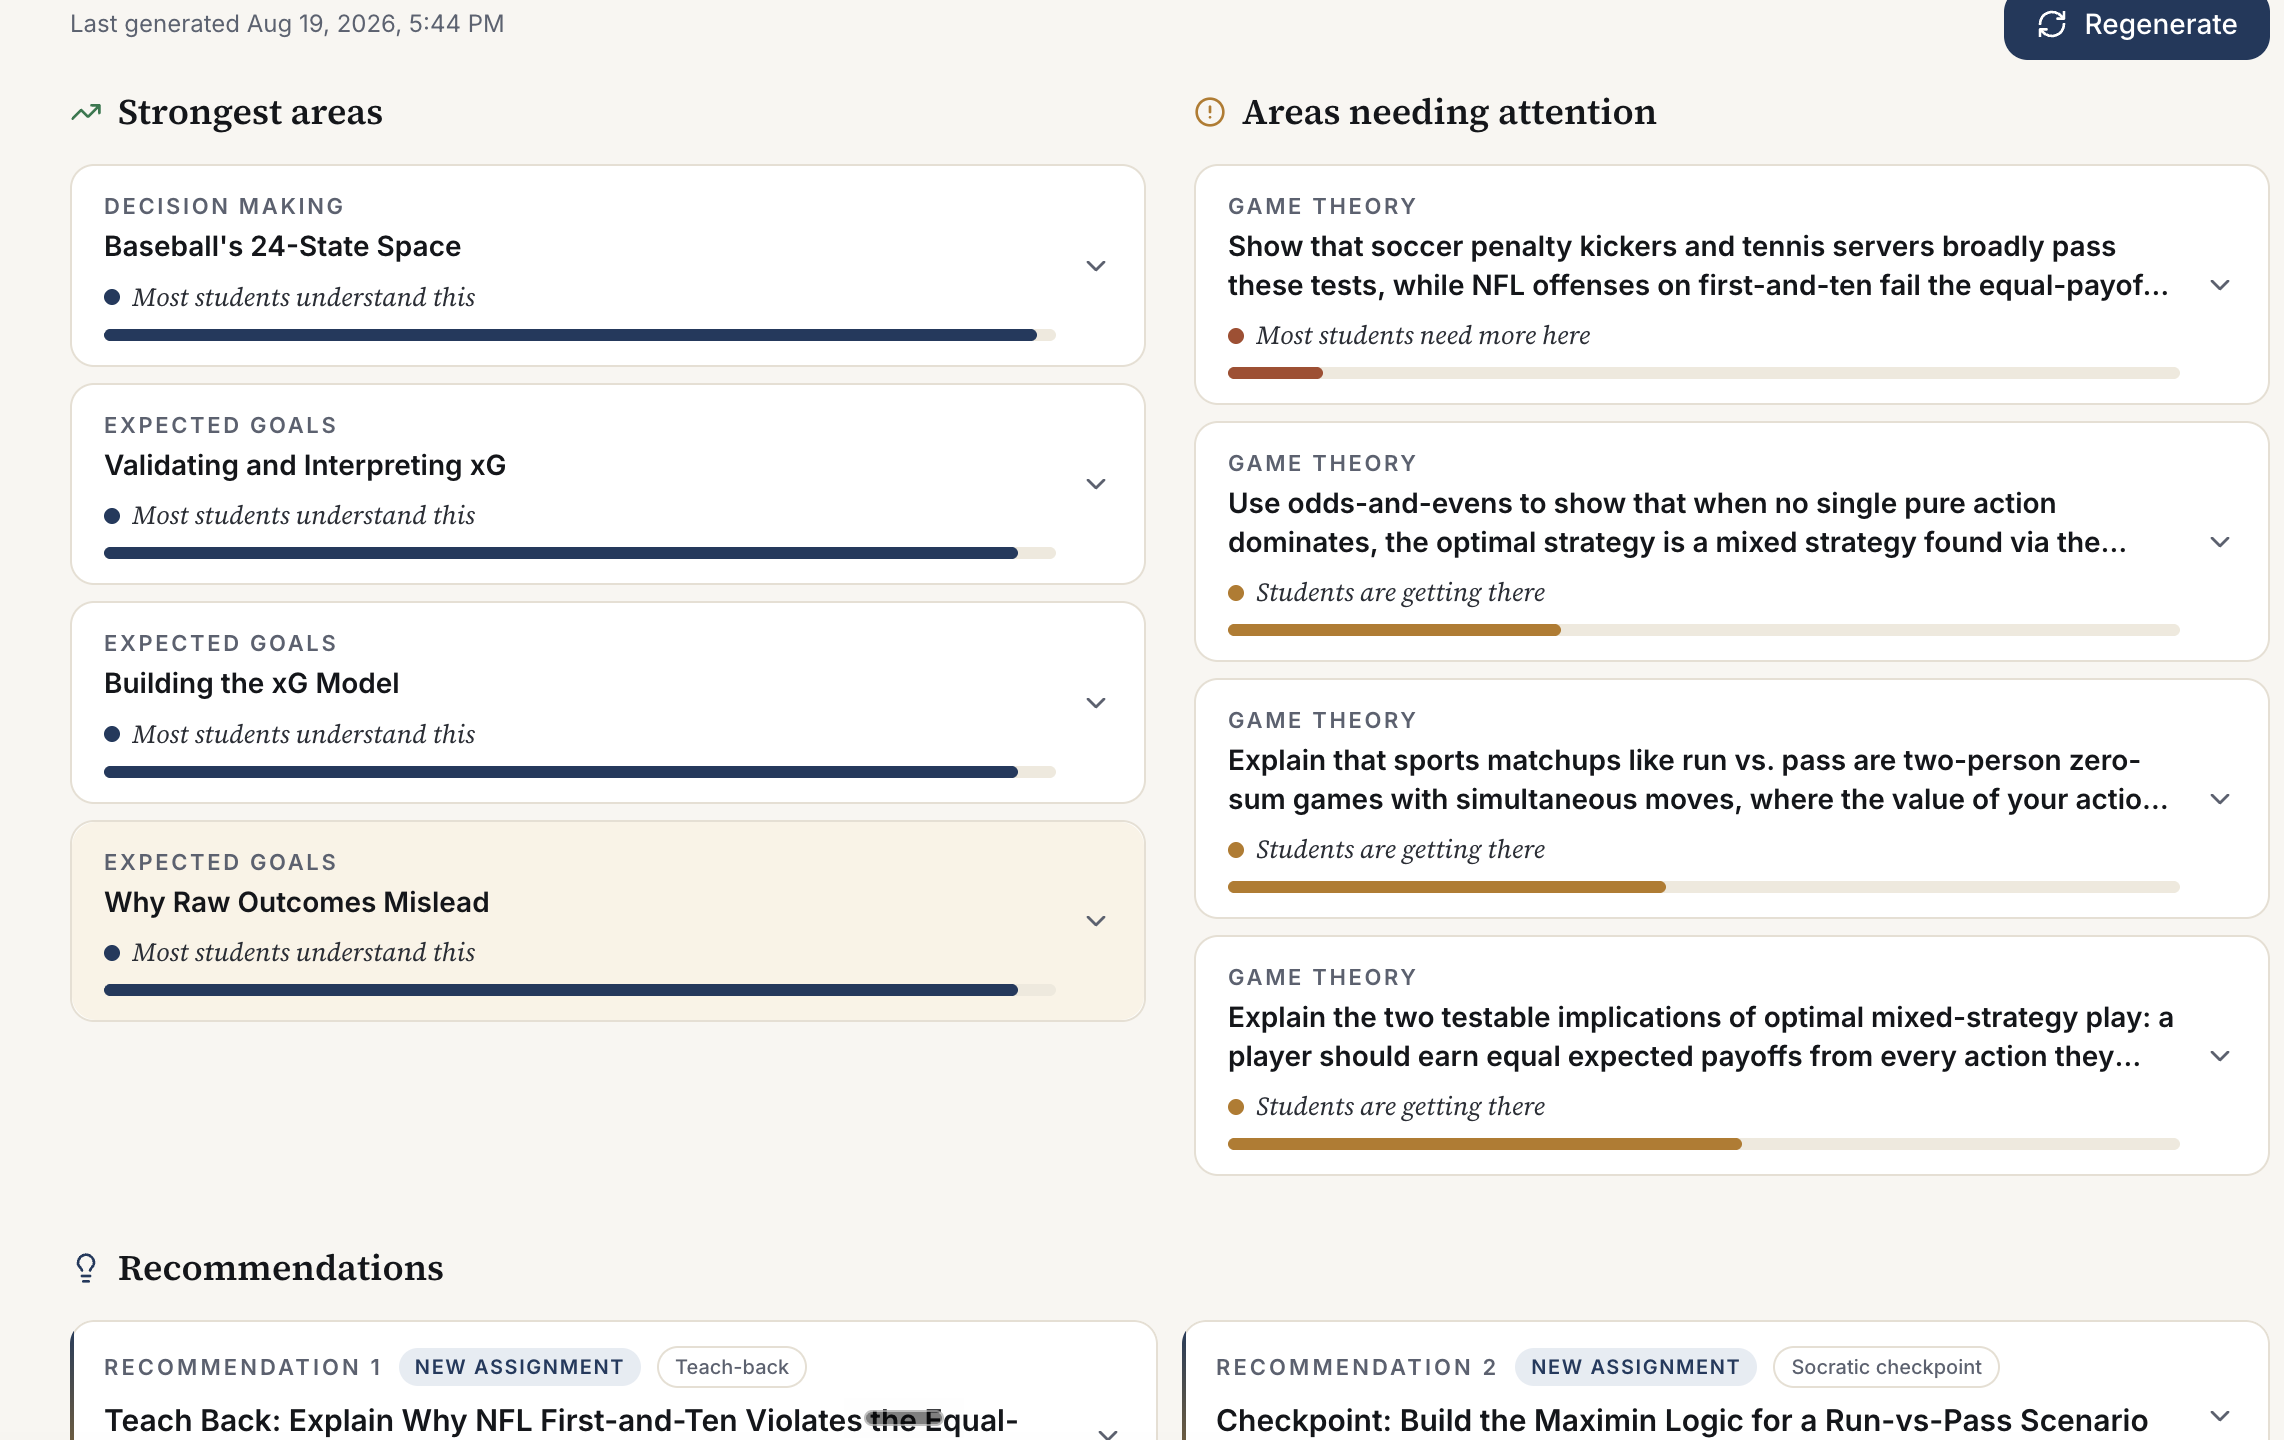
Class level
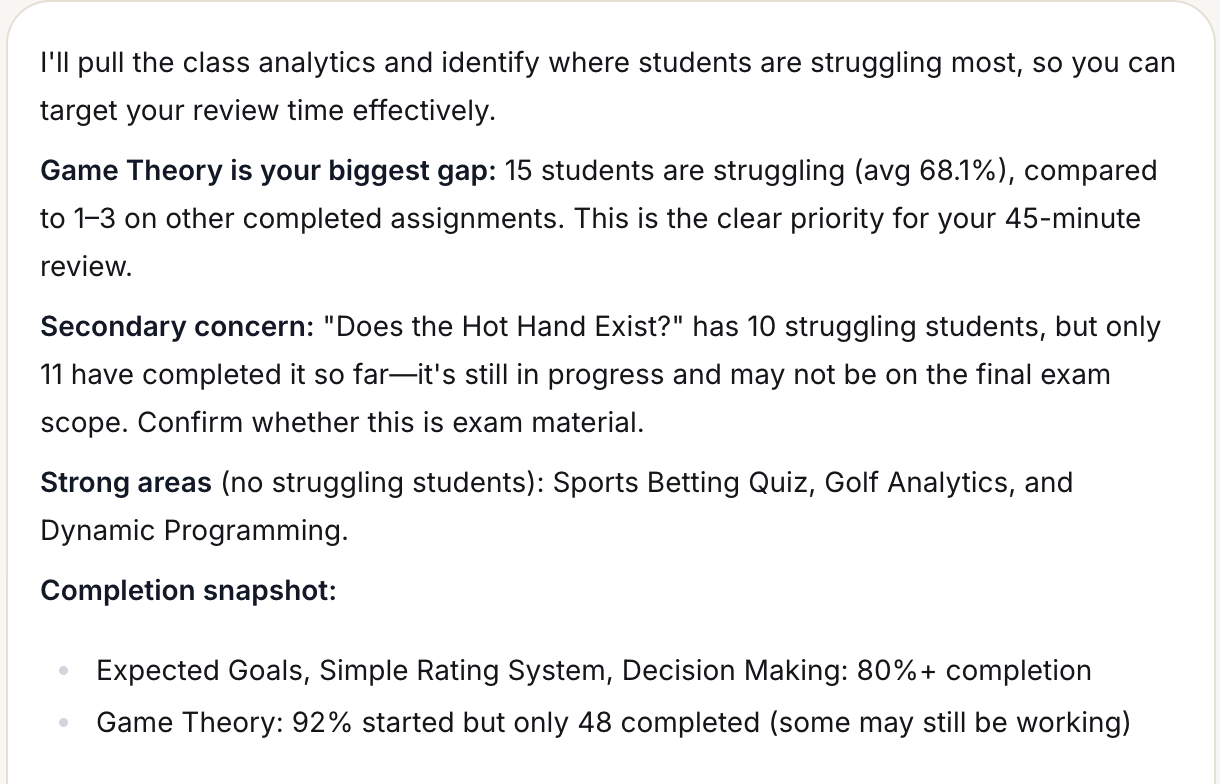
Across the course: strongest areas, areas needing attention, common misconceptions, and recommended next assignments to close the gaps.
Contextual AI: the Sympos AI Assistant
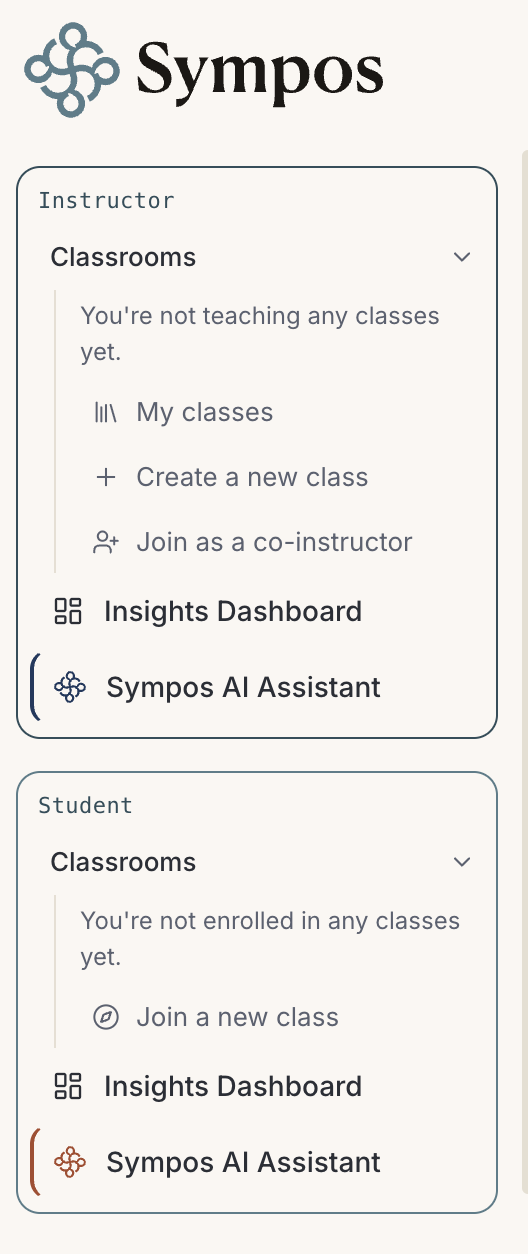
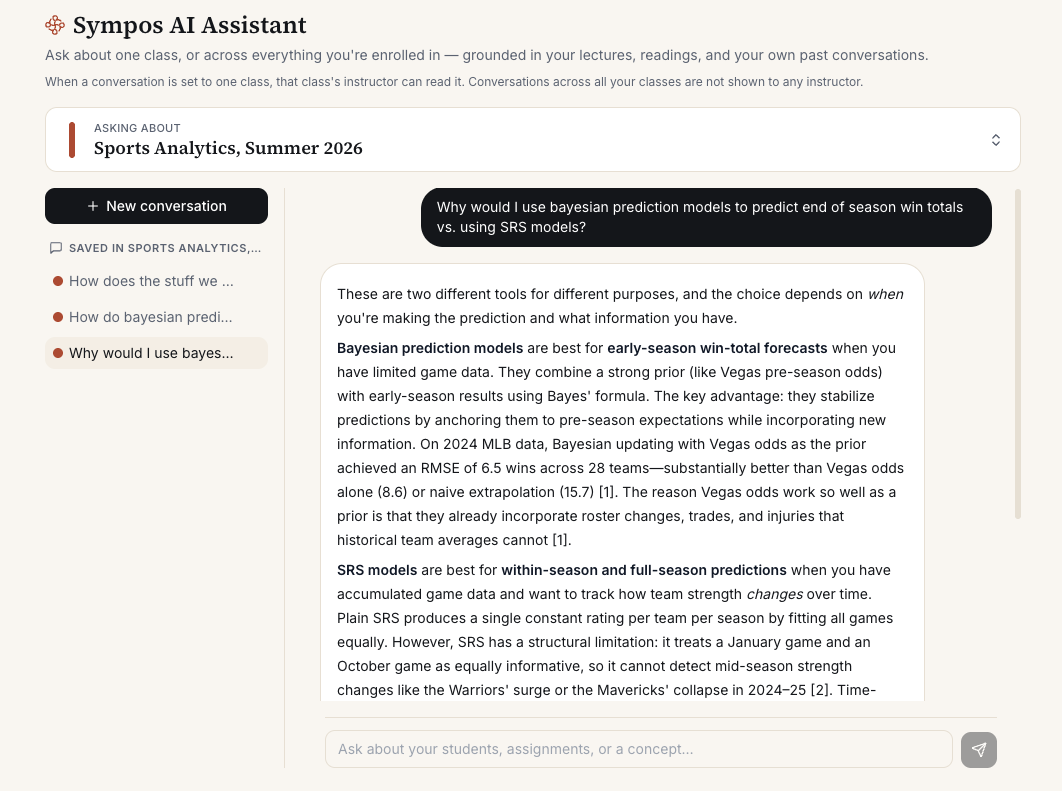
Beyond assignments, every class comes with the Sympos AI Assistant, grounded in what you uploaded. One side for students, one for you.

Go live: share the join code
Your join code lives in the Class Details tab of your class. Paste this into your announcement or syllabus:
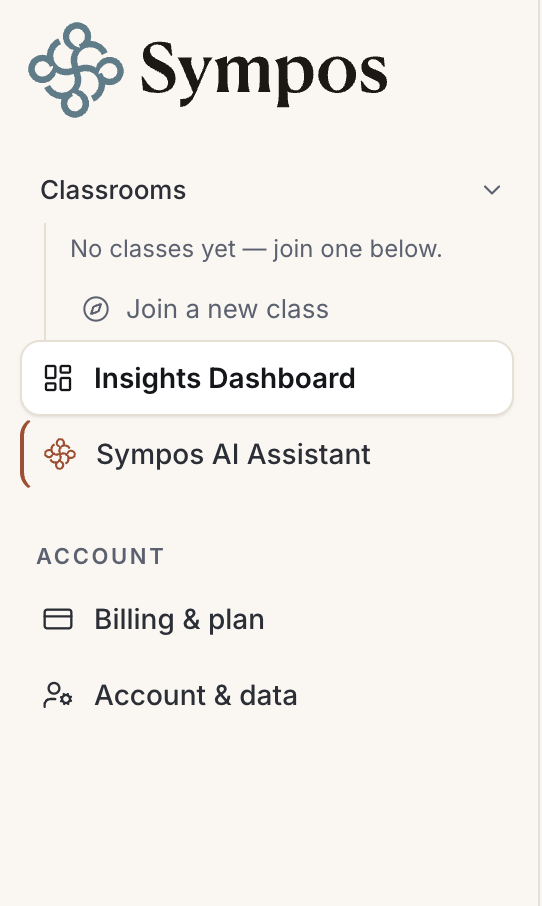
Once you have your class join code, students can join with the following steps:
- Create an account at https://sympos.org/
- Upon joining, you will be prompted to enter your student ID, please do so.
- Click "Join a new class" on the side bar.
- Enter the class code and click join.
If the class doesn't appear, refresh the screen.
Introduce Sympos to your students
Three things worth telling them it does for them:
- It is where they complete their assignments.
- They can ask the Sympos AI Assistant questions about the class and its material.
- It helps them see where their understanding needs work.
Questions or issues during the term? Email luke@sympos.org. Pilot issues get fixed fast.
The Sympos team · luke@sympos.org · sympos.org
Shape the conversation. Surface the learning.